The craft we did at or toddler group this week was nativity themed and it was followed by a simple service by the church who run it. It was all very sweet and the kids were dressed as angels, stars, wise men, many Mary’s and lots of sheep.
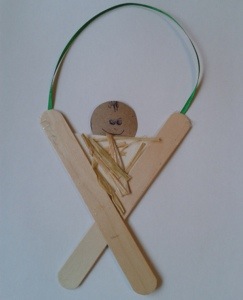
I glued the wooden sticks together in advance with a blob of hot glue and then the children drew a face on a circle, glued a triangle onto the manger, added straw and a ribbon hanger. Nice and simple. The one above was made by T age 3.
All posts tagged decoration
Away in a Manger
Posted by blueberrycottagecrafts on December 19, 2012
https://blueberrycottagecrafts.wordpress.com/2012/12/19/away-in-a-manger/
Advent Calendars
We made advent calendars at a class I went to with T and C this week, and I thought they were a great idea that was well worth sharing. We have two, but this is the one you can actually see the picture on, the other one is a wee bit glittery!
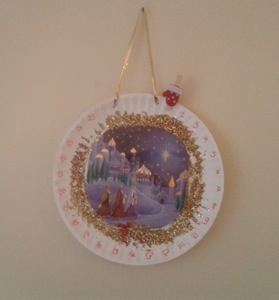
The picture was cut from from a Christmas card and glued into the centre of a paper plate which had the numbers 1 – 25 pre written around the edge. Then we had LOADS of fun with the glitter – I’m going to sparkle for a week. We added a hanging ribbon at the top and a little festive peg, which you move around the plate each day. So simple.
There are some really great ideas out there for Christmas countdowns that the children can make. These are a few of my favourites.
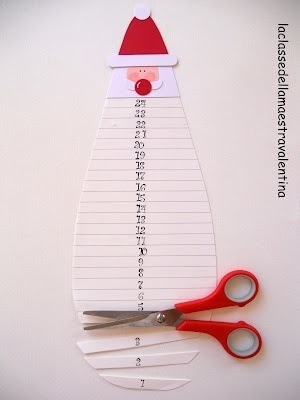
This one is a printable calendar from inviting printables. Each day you add a cotton wall ball to build up the beard.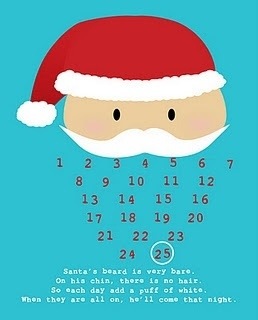
This one by maya made is just toilet rolls, you’d need 25 so would have to start collecting early, or ask the neighbours. The bottom is folded closed and they are wrapped with fabric scraps. You could use Christmas wrapping paper and they are large enough to fit a few treats in if you have a larger family.
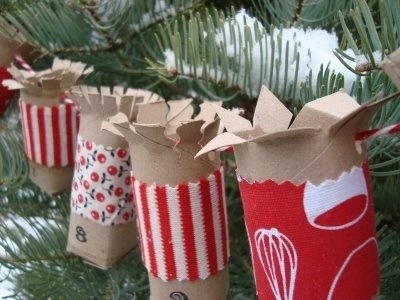
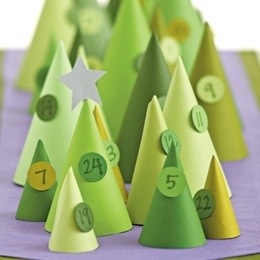
I love these trees, but couldn’t find the source. They would have fun making them and decorating them all and you can hide a surprise underneath.
This is cute from La Classe dells maestro valentina. Each day you snip Santa’s beard a little shorter.
Have fun and enjoy the countdown to Christmas, however you choose to do it.
Posted by blueberrycottagecrafts on November 28, 2012
https://blueberrycottagecrafts.wordpress.com/2012/11/28/advent-calendars/
Paper Tree Christmas Craft
When I was asked to do a craft workshop for a ladies group at my church, I spent a lot of time on Pinterest looking for ideas. I tried to convince myself it was important research, but really, I was just making the most of having a good reason to be browsing.
I needed a quick, cheap and easy craft that would be achievable by everyone there, and when I came across some cute little trees on Martha Stewart’s website, I thought they would be ideal.
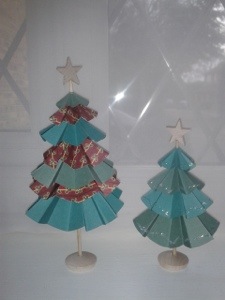
I adapted the idea slightly to use supplies I already had, and thought they would look great if we used a little patterned paper.
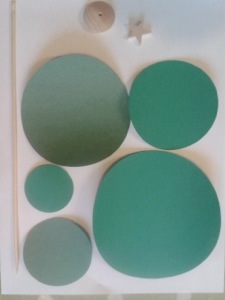
The trees start off as a kebab stick, which is cut to your required length and stuck in a stand of some kind. I drilled a hole in some little wooden discs I had. Circles of decreasing diameter are folded and glued to the stick and then it is finished off with a little bead or star. Again, I drilled into some little wooden stars I had left over from a different project.
As it turned out, and much as I love the ladies at my church, I think we would all agree that they didn’t find it as easy as I thought they would. For some people, folding paper was really tricky.
So I’m just going to give some tips that might help to make the tree more successful.
1. The size and number of your circles will determine the size of your tree. We found that 4 3/4″, 4″, 3 1/4″, 2 1/2″ 1 3/4″ worked well.
2. The folds are made by folding the circle in half and making a sharp crease. It is best to open it out before making the next fold. Always make sure the fold lines meet up to get evenly spaced creases. Keep going until there are 16 folds.
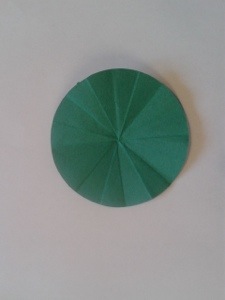
3. It is very easy to cut the hole in the centre too big for the stick. We just poked the stick through the centre in the end, to make a tight hole.
4. Put all the circles on the stick, glue on the topper, then arrange and fix each circle one at a time from the top down, using a blob of glue underneath to attach the circle to the stick. Then cut your stick to the the length you want and glue it to the stand.
This is a fun project because you can get a little creative with it. We had all sorts of trees on the night, bright multi patterned ones, long tall ones, glittery ones, short squat ones, and each one looked delightful and each one was unique.
Posted by blueberrycottagecrafts on November 27, 2012
https://blueberrycottagecrafts.wordpress.com/2012/11/27/paper-tree-christmas-craft/


